Overview
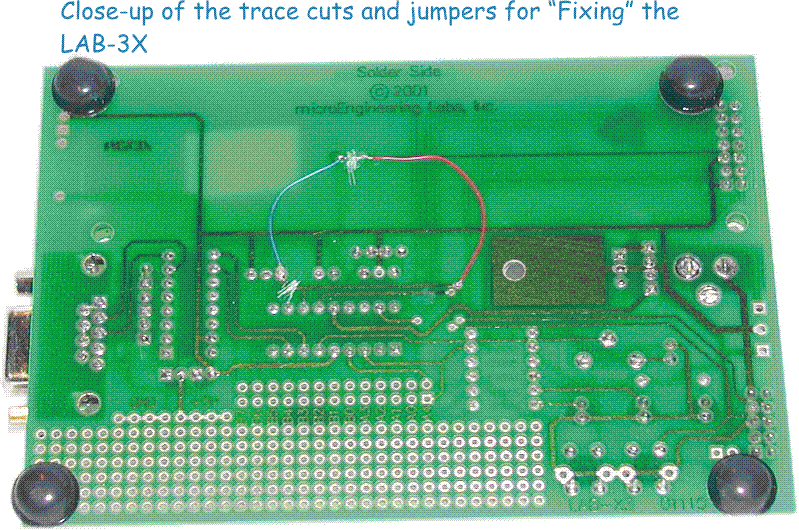
This close-up shows the two cuts and jumpers I made that swapped the PIC pins connected to the servo connector and the LCD module. Refer back to the article for the reasoning behind this :-) The blue wire on the left connects between the VIA (a small hole in the PCB where the trace goes to the other side) to the right-most pin of the servo connector. The red wire is soldered to the trace that has been cut (its the one going to E on the LCD) and to a VIA that is part of the trace going to RB6 (which is also used in programming!)